前回症例3の解説(その2) | 英語好きな歯科医の診療日記 (hn-dentist-english-blog.com)からの続きです。この症例の術前後の口腔内写真とレントゲンを示します。
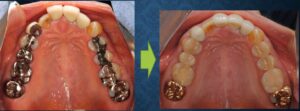
![](http://hn-dentist-english-blog.com/wp-content/uploads/2021/11/s-1024x377.png)
術前後の口腔内写真
![](http://hn-dentist-english-blog.com/wp-content/uploads/2021/11/f-1024x301.png)
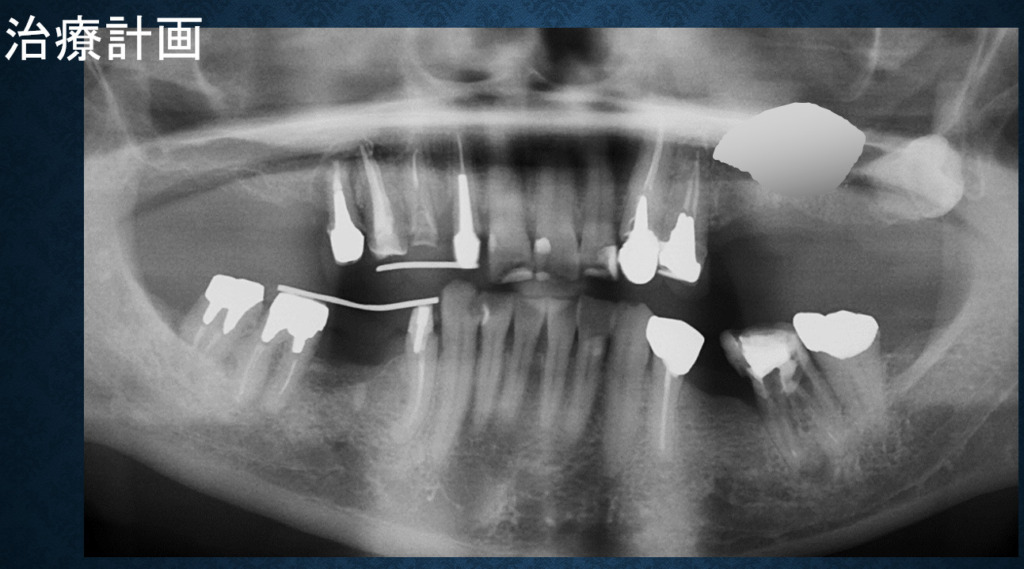
術前後のレントゲン。上両側の臼歯部欠損はサイナスリフト後インプラントで修復しました。
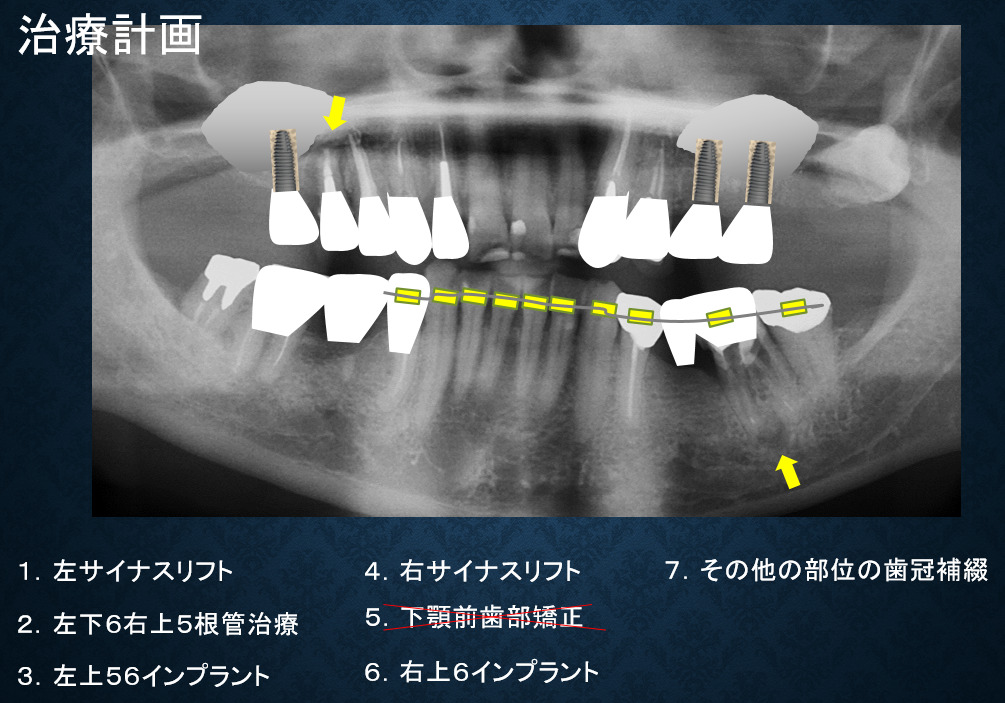
前回の解説にあるように模型上で最終的なイメージを膨らませてから、治療手順を以下のように計画し、パワーポイントスライドを見せながら患者さんに説明しました。
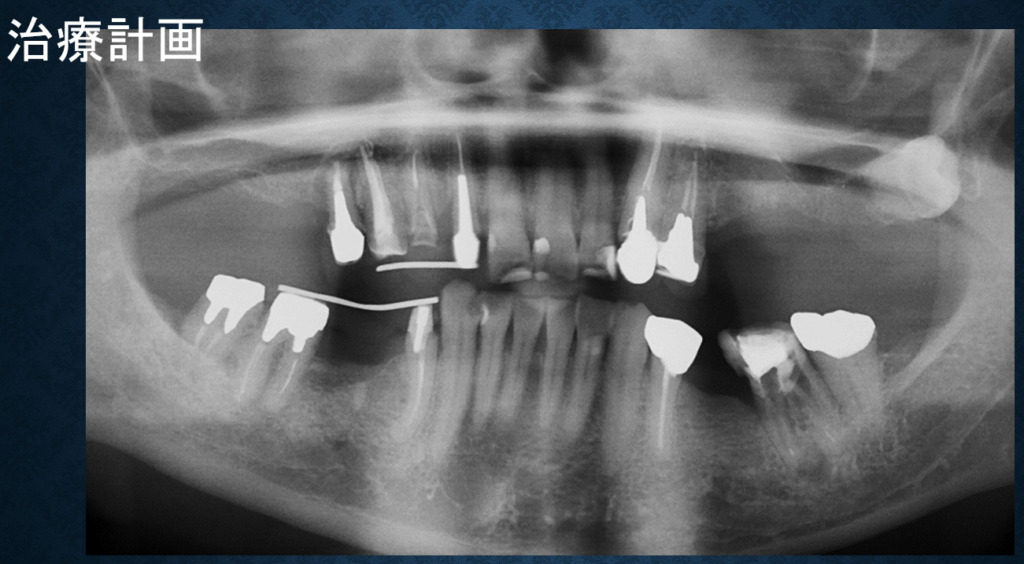
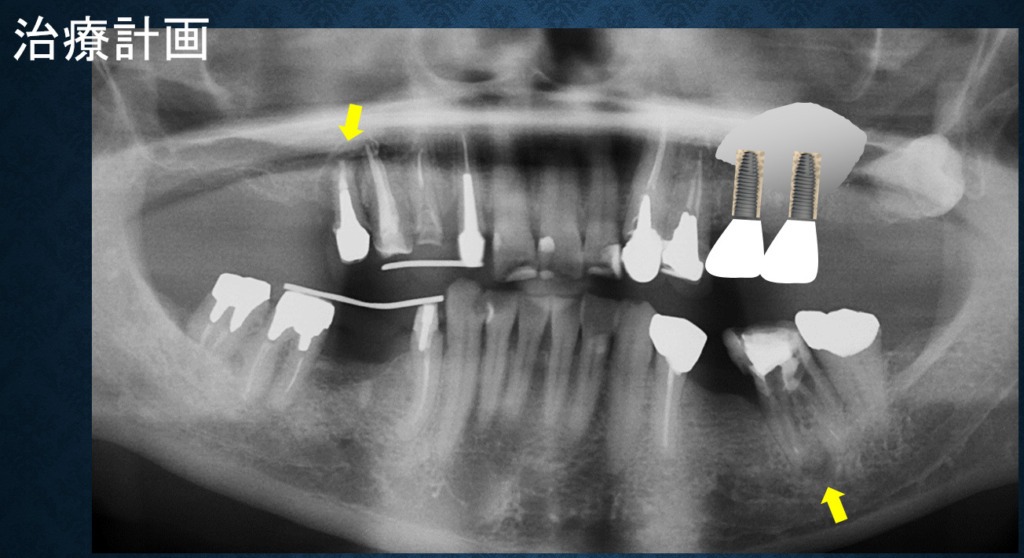
![](https://hn-dentist-english-blog.com/wp-content/uploads/2021/12/a-2-1024x564.jpg)
術前のレントゲンです。
![](https://hn-dentist-english-blog.com/wp-content/uploads/2021/12/b-1024x569.jpg)
まず患者さんの左側(レントゲンでは右)のサイナスリフト(副鼻腔内造骨術)を行います。
![](https://hn-dentist-english-blog.com/wp-content/uploads/2021/12/c-1024x559.jpg)
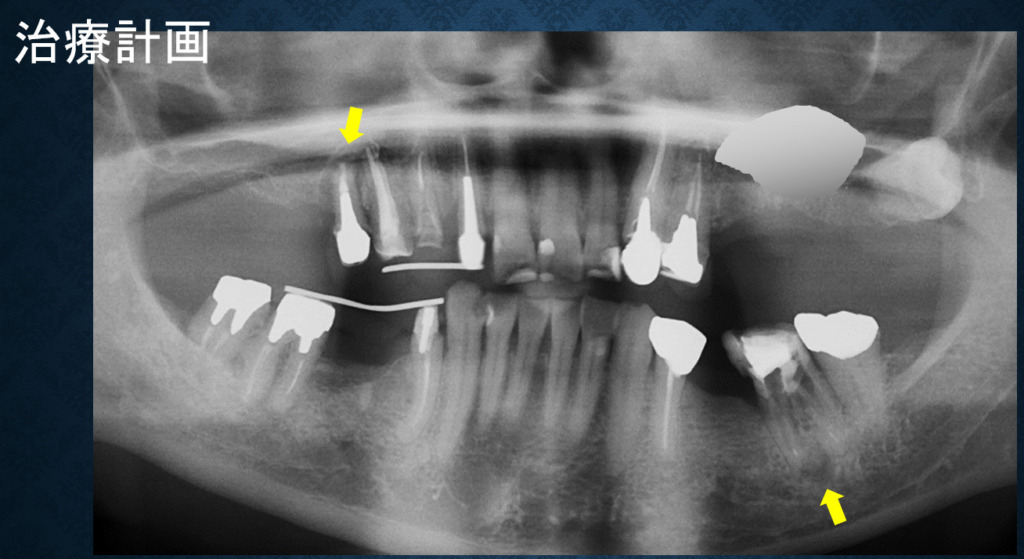
サイナスリフト後、インプラントできる骨になるまで半年待っている間に根管治療が必要な個所を行います(黄色矢印)。
![](https://hn-dentist-english-blog.com/wp-content/uploads/2021/12/d-1-1024x558.jpg)
サイナスリフトした所にインプラントを入れます。
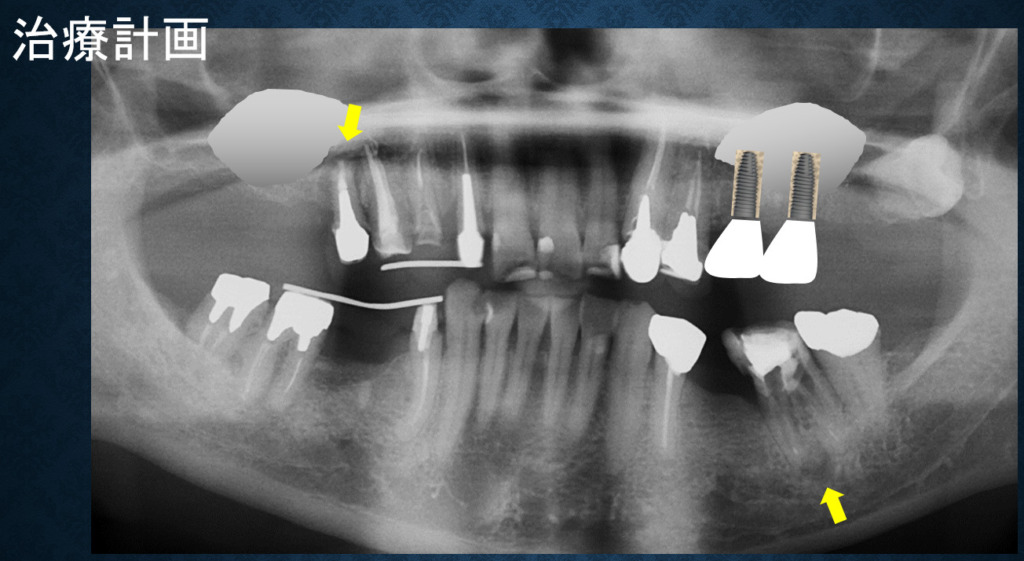
![](https://hn-dentist-english-blog.com/wp-content/uploads/2021/12/e-1024x561.jpg)
反対側のサイナスリフトを行います。
![](https://hn-dentist-english-blog.com/wp-content/uploads/2021/12/f-1024x566.jpg)
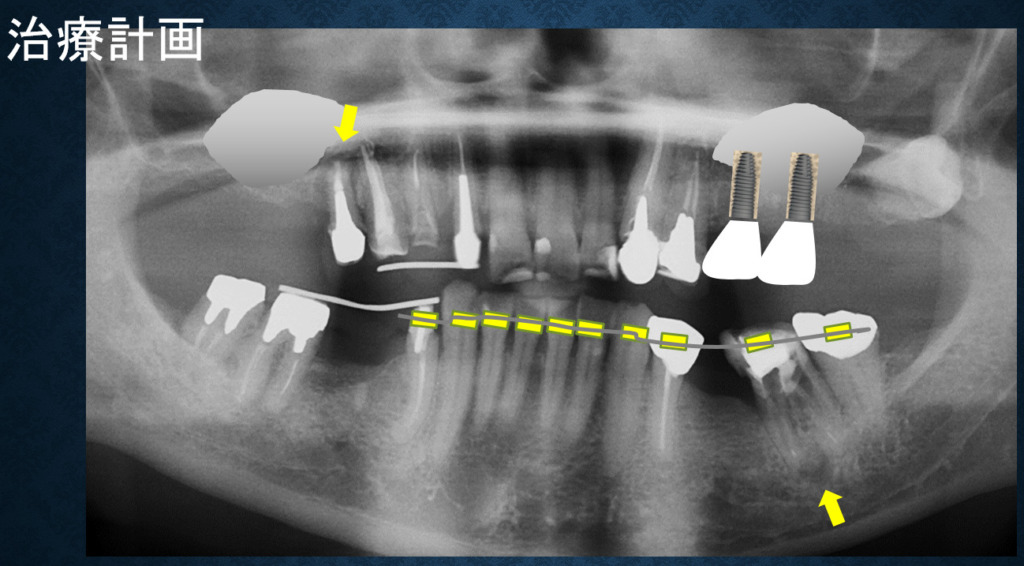
サイナスリフトした部位が骨になるまで半年待つ間に、部分矯正を当初計画しました。
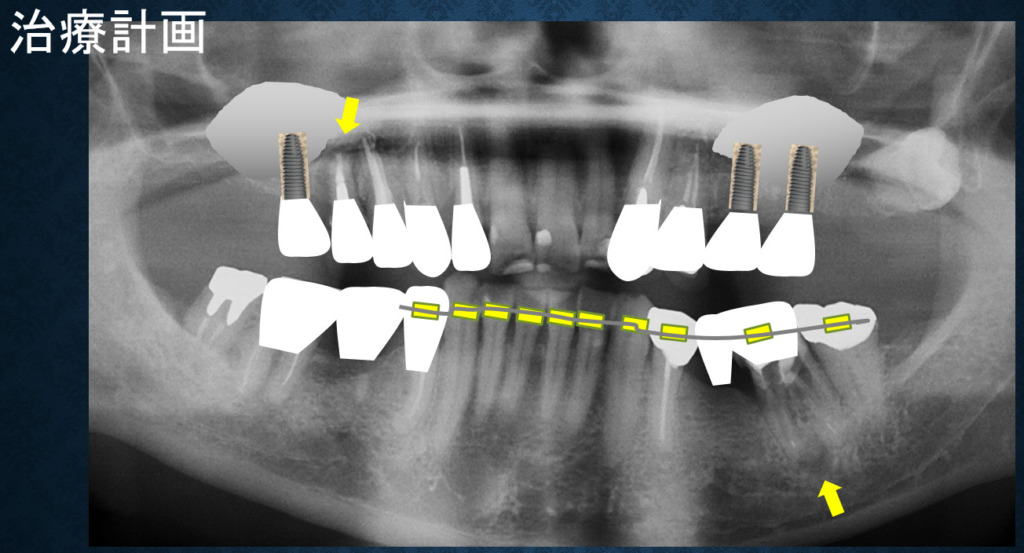
![](https://hn-dentist-english-blog.com/wp-content/uploads/2021/12/h-1024x553.jpg)
仮歯から本番の被せ物にします。
![](https://hn-dentist-english-blog.com/wp-content/uploads/2021/12/i.jpg)
結局、矯正はしないことになりました。
続きはその4で。症例3の解説(その4) | 英語好きな歯科医の診療日記 (hn-dentist-english-blog.com)
コメント